[CODE/JAVA] ARGB_8888 Pixel Abstraction

This is one of the ways you can decode Pixel colors out of the integers you get from Android Pixels.

ARGB_8888, stands for Alpha, Reg, Green, Blue. The 8’s stand for the number of bits per channel.

In Android, signed int‘s are used to represent pixel’s alpha/color information.
Since Android’s language of choice is java, these ints are 32-bit integers, each int takes 4 bytes.

4 bytes = 32 bits = 8bits + 8bits + 8bits + 8bits.

If you had an int like 0xFFAABBCC, each pair of letters on that hexadecimal would mean the following from left to right

{alpha=0xFF}{red=0xAA){green=0xBB}{blue=0xCC}

If you’ve done web programming and played with rgb colors and you didn’t know about this, now it all should click on how your web browser represents colors, except in HTML you don’t deal with the alpha value in the front. On Android’s XML you do.

In bits (binary), the 0xFFAABBCC value would look like this:

alpha red green blue
0xFF 0xAA 0xBB 0xCC
255 170 187 204
{0b11111111}{0b10101010}{0b10111011}{0b11001100}

If you wanted to look at the entire number in binary/bits, it’d be something like this (leaving spaces for visual help):

0b11111111 10101010 10111011 11001100 == 0xFFAABBCC == 4289379276

So if you wanted to get the red channel (0xAA = 170 = 0b10101010) , you’d have to move the whole thing towards the right 16 places, and then compare it with only the rightmost 8 bits.

So, we shift 16 places to the right, we’d get rid of the 2 bytes on the right side and end up only with the left half

0b11111111 10101010

Since we only care about those 8 bits on the right, we do an “&” (bitwise “and”) against 0xFF=255=0b111111111 (all 8 rightmost bits set to 1)

0b11111111 10101010 &
0b00000000 11111111
====================
0b00000000 10101010

So with simple right bit shifting and “& 0xff” of the shifted value we can extract the values per channel.

This class also features a “multiplyByFloat()” function, which I was using to multiply to each channel as I was operating with convolution kernels while playing with image filters.

[pastacode lang=”java” manual=”%2F**%20ARGB_8888%20Pixel%20abstraction%20*%2F%0Apublic%20static%20class%20PixelARGB_8888%20%7B%0A%20public%20final%20byte%20a%3B%0A%20public%20final%20byte%20r%3B%0A%20public%20final%20byte%20g%3B%0A%20public%20final%20byte%20b%3B%0A%20public%20final%20int%20intVal%3B%0A%0A%20public%20PixelARGB_8888(final%20int%20argb32bitInt)%20%7B%0A%20%20a%20%3D%20(byte)((argb32bitInt%20%3E%3E%2024)%20%26%200xff)%3B%0A%20%20r%20%3D%20(byte)((argb32bitInt%20%3E%3E%2016)%20%26%200xff)%3B%0A%20%20g%20%3D%20(byte)((argb32bitInt%20%3E%3E%208)%20%26%200xff)%3B%0A%20%20b%20%3D%20(byte)(argb32bitInt%20%26%200xff)%3B%0A%20%20intVal%20%3D%20argb32bitInt%3B%0A%20%7D%0A%0A%20public%20PixelARGB_8888(byte%20a%2C%20byte%20r%2C%20byte%20g%2C%20byte%20b)%20%7B%0A%20%20this.a%20%3D%20a%3B%0A%20%20this.r%20%3D%20r%3B%0A%20%20this.g%20%3D%20g%3B%0A%20%20this.b%20%3D%20b%3B%0A%20%20intVal%20%3D%20(a%20%3C%3C%2024)%20%2B%20(r%20%3C%3C%2016)%20%2B%20(g%20%3C%3C%208)%20%2B%20b%3B%0A%20%7D%0A%0A%20public%20static%20int%20multiplyByFloat(float%20factor%2C%20int%20arg32bitInt)%20%7B%0A%20%20return%20multiplyByFloat(factor%2C%20arg32bitInt%2C%20false)%3B%0A%20%7D%0A%0A%20public%20static%20int%20multiplyByFloat(float%20factor%2C%20int%20argb32bitInt%2C%20boolean%20multiplyAlphaChannel)%20%7B%0A%20%20PixelARGB_8888%20original%20%3D%20new%20PixelARGB_8888(argb32bitInt)%3B%0A%20%20byte%20alpha%20%3D%20original.a%3B%0A%20%20if%20(multiplyAlphaChannel)%20%7B%0A%20%20%20alpha%20%3D%20(byte)(original.a%20*%20factor)%3B%0A%20%20%7D%0A%20%20PixelARGB_8888%20multiplied%20%3D%20new%20PixelARGB_8888(alpha%2C%20(byte)(factor%20*%20original.r)%2C%20(byte)(factor%20*%20original.g)%2C%20(byte)(factor%20*%20original.b))%3B%0A%20%20return%20multiplied.intVal%3B%0A%20%7D%0A%7D” message=”” highlight=”” provider=”manual”/]

[ANDROID] How to set a custom title View on a DialogPreference extending class.

So you have a FooDialogPreference class which extends DialogPreference, and one of the things you’d like to do to it, is to change the Dialog’s title.

DialogPreference happens to be a bit of a bitch, you can’t just call getDialog() and start playing with its features before it is shown because the Dialog object is only created when DialogPreference.showDialog()is called.

However, there’s ONE entry point where you can make your magic happen.

If we look at the code of
DialogPreference.showDialog()
from the geniuses at the Android project, some gentle soul added a call to
onPrepareDialogBuilder(mBuilder); which is a method you’re meant to override.

Override this method, and then with the builder object you’ve received you will be able to call:

builder.setCustomTitle(myCustomTitleView);

However, there’s a couple of things you need to do:

  1. Instantiate your myCustomTitleView object on the implementation of your onBindDialogView, and keep the reference as a private property of your FooDialogPreference class.

  2. Make sure to detach it from it’s parent ViewGroup, otherwise you will get an IllegalStateException from android.view.ViewGroup.addViewInner() letting you know this view you’re trying to add, cannot have a parent.

This is what I had to do:

[pastacode lang=”java” manual=”final%20ViewGroup%20parent%20%3D%20(ViewGroup)%20myCustomTitleView.getParent()%3B%0Aparent.removeView(myCustomTitleView)%3B%0Abuilder.setCustomTitle(myCustomTitleView)%3B” message=”” highlight=”” provider=”manual”/]

That’s all folks!

How to create a list that holds different object types using `void*` in C.

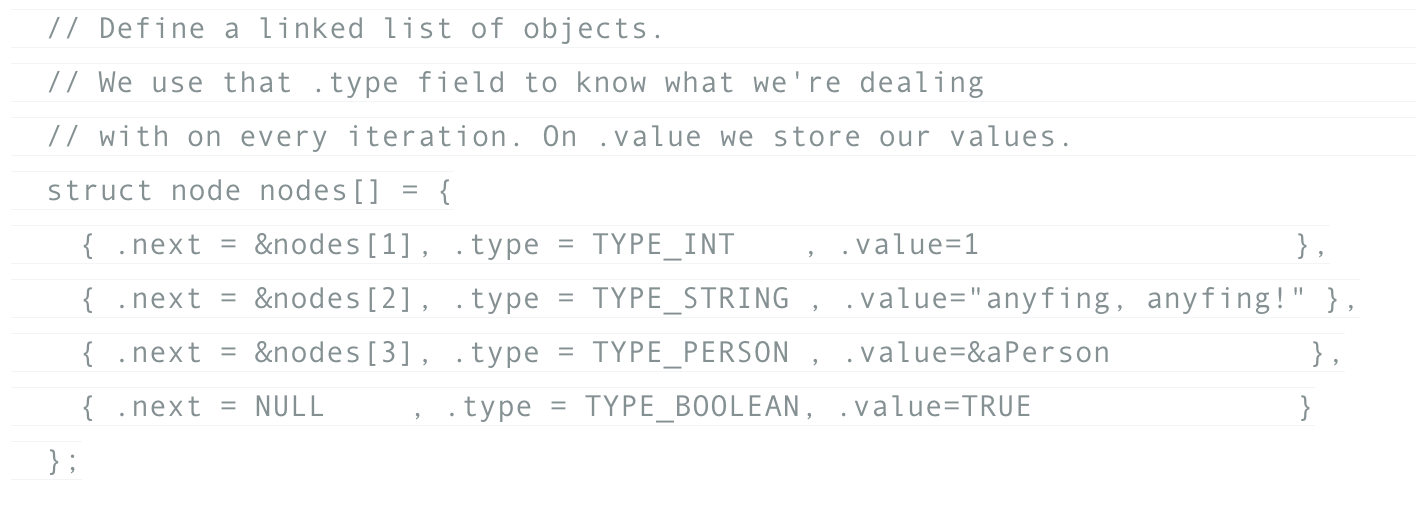
I remember being in school back around 1998 and not knowing enough about C to do this. After coding in other languages, then going back to C++ and understanding at a lower level how references and pointers work, this was pretty easy to figure out.

In this exercise I store elements of different types in a forward linked list.
In order to know what to dereference as I iterate through the list’s elements, I’ve put a “.type” field, which has an int value representing the type of the object stored.

The “.value” is simply a void*, which lets me store a pointer of any kind, and it works pretty well.

Here’s the code for your enjoyment, I hope this is useful to C apprentices.

The example shows how you can store native types like int, or more complex char* or even a struct person* (which is the more useful probably to your purposes)

It’s a good exercise to see the uses of the “address of” operator “&”, which is used to initialize pointers (the ‘&’ can also be used differently to create references, which I call in my mind as ‘aliases’, but this is not shown in this example)

I also play with a not so popular syntax to access a pointer’s sub-fields:

(*myPointer).structField == myPointer->structField

to teach you that the -> is a short hand for dereferencing a pointer and accessing one of its fields.

[pastacode lang=”c” manual=”%2F%2F%20%20%20%20%20%20%20%20%20%20%20%20%20%20%20%20%20%20%20%20%20%20%20%20%20%20%20%20%20%20%20%20%20%20%20%20%20%20%20%20%20%20%20%20%20%20%20%20%20%20%20%20%20%20%20%20%20%20%20%20%20%20%20%20%20%20%20%20%20%20%20%20%20%20%20%20%20%20%20%20%20%20%20%20%20%20%20%20%20%20%20%20%20%20%20%20%20%20%20%20%20%20%20%20%20%20%20%20%20%20%20%20%20%20%20%20%20%20%20%20%20%20%20%20%20%20%20%20%20%20%20%20%20%20%20%20%20%20%20%20%20%20%20%20%20%20%20%20%20%20%20%20%20%20%20%20%20%20%20%20%20%20%20%20%20%20%20%20%20%20%20%20%20%20%20%20%20%20%20%20%20%20%20%20%20%20%0A%2F%2F%20An%20exercise%20to%20play%20with%20a%20struct%20that%20stores%20anything%20using%20a%20void*%20field.%20%20%20%20%20%20%20%20%20%20%20%20%20%20%20%20%20%20%20%20%20%20%20%20%20%20%20%20%20%20%20%20%20%20%20%20%20%20%20%20%20%20%20%20%20%20%20%20%20%20%20%20%20%20%20%20%20%20%20%20%20%20%20%20%20%20%20%20%20%20%20%20%20%20%20%20%20%20%20%20%20%20%20%20%20%20%20%20%20%20%20%20%20%20%20%20%20%20%20%20%20%20%20%20%20%20%20%20%20%20%0A%2F%2F%20%20%20%20%20%20%20%20%20%20%20%20%20%20%20%20%20%20%20%20%20%20%20%20%20%20%20%20%20%20%20%20%20%20%20%20%20%20%20%20%20%20%20%20%20%20%20%20%20%20%20%20%20%20%20%20%20%20%20%20%20%20%20%20%20%20%20%20%20%20%20%20%20%20%20%20%20%20%20%20%20%20%20%20%20%20%20%20%20%20%20%20%20%20%20%20%20%20%20%20%20%20%20%20%20%20%20%20%20%20%20%20%20%20%20%20%20%20%20%20%20%20%20%20%20%20%20%20%20%20%20%20%20%20%20%20%20%20%20%20%20%20%20%20%20%20%20%20%20%20%20%20%20%20%20%20%20%20%20%20%20%20%20%20%20%20%20%20%20%20%20%20%20%20%20%20%20%20%20%20%20%20%20%20%20%20%0A%0A%23include%20%3Cstdio.h%3E%0A%0A%23define%20TRUE%201%0A%0Aint%20TYPE_INT%20%3D%200%3B%0Aint%20TYPE_STRING%20%3D%201%3B%0Aint%20TYPE_BOOLEAN%20%3D%202%3B%0Aint%20TYPE_PERSON%20%3D%203%3B%0A%0Astruct%20node%20%7B%0A%20%20struct%20node*%20next%3B%0A%20%20int%20type%3B%0A%20%20void*%20value%3B%0A%7D%3B%0A%0Astruct%20person%20%7B%0A%20%20char*%20name%3B%0A%20%20int%20age%3B%0A%7D%3B%0A%0Aint%20main(int%20args%2C%20char%20**argv)%20%7B%0A%0A%20%20struct%20person%20aPerson%3B%0A%20%20aPerson.name%20%3D%20%22Angel%22%3B%0A%20%20aPerson.age%20%3D%2035%3B%0A%0A%20%20%2F%2F%20Define%20a%20linked%20list%20of%20objects.%20%20%20%20%20%20%20%20%20%20%20%20%20%20%20%20%20%20%20%20%20%20%20%20%20%20%20%20%20%20%20%20%20%20%20%20%20%20%20%20%20%20%20%20%20%20%20%20%20%20%20%20%20%20%20%20%20%20%20%20%20%20%20%20%20%20%20%20%20%20%20%20%20%20%20%20%20%20%20%20%20%20%20%20%20%20%20%20%20%20%20%20%20%20%20%20%20%20%20%20%20%20%20%20%20%20%20%20%20%20%20%20%20%20%20%20%20%20%20%20%20%20%20%20%20%20%20%20%20%20%20%20%20%20%20%20%20%20%20%20%20%20%20%20%20%20%20%20%20%20%20%0A%20%20%2F%2F%20We%20use%20that%20.type%20field%20to%20know%20what%20we’re%20dealing%20%20%20%20%20%20%20%20%20%20%20%20%20%20%20%20%20%20%20%20%20%20%20%20%20%20%20%20%20%20%20%20%20%20%20%20%20%20%20%20%20%20%20%20%20%20%20%20%20%20%20%20%20%20%20%20%20%20%20%20%20%20%20%20%20%20%20%20%20%20%20%20%20%20%20%20%20%20%20%20%20%20%20%20%20%20%20%20%20%20%20%20%20%20%20%20%20%20%20%20%20%20%20%20%20%20%20%20%20%20%20%20%20%20%20%20%20%20%20%20%20%20%20%20%20%20%20%20%20%20%20%20%20%0A%20%20%2F%2F%20with%20on%20every%20iteration.%20On%20.value%20we%20store%20our%20values.%20%20%20%20%20%20%20%20%20%20%20%20%20%20%20%20%20%20%20%20%20%20%20%20%20%20%20%20%20%20%20%20%20%20%20%20%20%20%20%20%20%20%20%20%20%20%20%20%20%20%20%20%20%20%20%20%20%20%20%20%20%20%20%20%20%20%20%20%20%20%20%20%20%20%20%20%20%20%20%20%20%20%20%20%20%20%20%20%20%20%20%20%20%20%20%20%20%20%20%20%20%20%20%20%20%20%20%20%20%20%20%20%20%20%20%20%20%20%20%20%20%20%20%20%20%20%20%20%0A%20%20struct%20node%20nodes%5B%5D%20%3D%20%7B%0A%20%20%20%20%7B%20.next%20%3D%20%26nodes%5B1%5D%2C%20.type%20%3D%20TYPE_INT%20%20%20%20%2C%20.value%3D1%20%20%20%20%20%20%20%20%20%20%20%20%20%20%20%20%20%20%20%7D%2C%0A%20%20%20%20%7B%20.next%20%3D%20%26nodes%5B2%5D%2C%20.type%20%3D%20TYPE_STRING%20%2C%20.value%3D%22anyfing%2C%20anyfing!%22%20%7D%2C%0A%20%20%20%20%7B%20.next%20%3D%20%26nodes%5B3%5D%2C%20.type%20%3D%20TYPE_PERSON%20%2C%20.value%3D%26aPerson%20%20%20%20%20%20%20%20%20%20%20%20%7D%2C%0A%20%20%20%20%7B%20.next%20%3D%20NULL%20%20%20%20%20%2C%20.type%20%3D%20TYPE_BOOLEAN%2C%20.value%3DTRUE%20%20%20%20%20%20%20%20%20%20%20%20%20%20%20%20%7D%0A%20%20%7D%3B%0A%0A%20%20%2F%2F%20We%20iterate%20through%20the%20list%20%20%20%20%20%20%20%20%20%20%20%20%20%20%20%20%20%20%20%20%20%20%20%20%20%20%20%20%20%20%20%20%20%20%20%20%20%20%20%20%20%20%20%20%20%20%20%20%20%20%20%20%20%20%20%20%20%20%20%20%20%20%20%20%20%20%20%20%20%20%20%20%20%20%20%20%20%20%20%20%20%20%20%20%20%20%20%20%20%20%20%20%20%20%20%20%20%20%20%20%20%20%20%20%20%20%20%20%20%20%20%20%20%20%20%20%20%20%20%20%20%20%20%20%20%20%20%20%20%20%20%20%20%20%20%20%20%20%20%20%20%20%20%20%20%20%20%20%20%20%20%20%20%20%20%20%0A%20%20for%20(%20struct%20node%20*currentNode%20%3D%20%26nodes%5B0%5D%3B%20currentNode%3B%20%20currentNode%20%3D%20currentNode-%3Enext)%20%7B%0A%20%20%20%20int%20currentType%20%3D%20(*currentNode).type%3B%0A%20%20%20%20if%20(currentType%20%3D%3D%20TYPE_INT)%20%7B%0A%20%20%20%20%20%20printf(%22%25s%3A%20%25dn%22%2C%20%22-%20INTEGER%22%2C%20(*currentNode).value)%3B%20%2F%2F%20just%20playing%20with%20syntax%2C%20same%20as%20currentNode-%3Evalue%20%20%20%20%20%20%20%20%20%20%20%20%20%20%20%20%20%20%20%20%20%20%20%20%20%20%20%20%20%20%20%20%20%20%20%20%20%20%20%20%20%20%20%20%20%20%20%20%20%20%20%20%20%20%20%20%20%20%20%20%20%20%20%20%20%20%20%20%20%20%20%20%0A%20%20%20%20%7D%20else%20if%20(currentType%20%3D%3D%20TYPE_STRING)%20%7B%0A%20%20%20%20%20%20printf(%22%25s%3A%20%25sn%22%2C%20%22-%20STRING%22%2C%20currentNode-%3Evalue)%3B%0A%20%20%20%20%7D%20else%20if%20(currentType%20%3D%3D%20TYPE_BOOLEAN)%20%7B%0A%20%20%20%20%20%20printf(%22%25s%3A%20%25dn%22%2C%20%22-%20BOOLEAN%20(true%3A1%2C%20false%3A0)%22%2C%20currentNode-%3Evalue)%3B%0A%20%20%20%20%7D%20else%20if%20(currentType%20%3D%3D%20TYPE_PERSON)%20%7B%0A%20%20%20%20%20%20%20%20%2F%2F%20since%20we’re%20using%20void*%2C%20we%20end%20up%20with%20a%20pointer%20to%20struct%20person%2C%20which%20we%20*dereference%20%20%20%20%20%20%20%20%20%20%20%20%20%20%20%20%20%20%20%20%20%20%20%20%20%20%20%20%20%20%20%20%20%20%20%20%20%20%20%20%20%20%20%20%20%20%20%20%20%20%20%20%20%20%20%20%20%20%20%20%20%20%20%20%20%20%20%20%20%20%20%20%20%20%20%20%20%20%20%20%20%20%20%20%20%20%20%20%0A%20%20%20%20%20%20%20%20%2F%2F%20into%20a%20struct%20in%20the%20stack.%20%20%20%20%20%20%20%20%20%20%20%20%20%20%20%20%20%20%20%20%20%20%20%20%20%20%20%20%20%20%20%20%20%20%20%20%20%20%20%20%20%20%20%20%20%20%20%20%20%20%20%20%20%20%20%20%20%20%20%20%20%20%20%20%20%20%20%20%20%20%20%20%20%20%20%20%20%20%20%20%20%20%20%20%20%20%20%20%20%20%20%20%20%20%20%20%20%20%20%20%20%20%20%20%20%20%20%20%20%20%20%20%20%20%20%20%20%20%20%20%20%20%20%20%20%20%20%20%20%20%20%20%20%20%20%20%20%20%20%20%20%20%20%20%20%20%20%20%20%20%0A%20%20%20%20%20%20%20%20struct%20person%20currentPerson%20%3D%20*(struct%20person*)%20currentNode-%3Evalue%3B%0A%20%20%20%20%20%20%20%20printf(%22%25s%3A%20%25s%20(%25d)n%22%2C%22-%20TYPE_PERSON%22%2C%20currentPerson.name%2C%20currentPerson.age)%3B%0A%20%20%20%20%20%20%7D%0A%20%20%7D%0A%0A%20%20%20%20return%200%3B%0A%7D” message=”” highlight=”” provider=”manual”/]

The output is this:

- INTEGER: 1
- STRING: anyfing, anyfing!
- TYPE_PERSON: Angel (35)
- BOOLEAN (true:1, false:0): 1

GRADLE: How to specify resources from different folders on your sourceSet

Sometimes you need to have resources in your sourceset and these may come from different locations on disk, the official documentation is lacking in real world examples, or at least I just didn’t understand it very well, but from reading forums I finally got it to work.

In the example I specify what files to include/exclude from two different folders.
When the final .jar is created, they’ll keep the package path structure that lives inside the given srcDir folders.

If you just want to add these files (for some reason to the root of your resulting jar, you should make srcDir the full path to where the files live)

[pastacode lang=”java” manual=”sourceSets%20%7B%0Amain%20%7B%0Ajava%20%7B%0A%2F%2Fyour%20java%20source%20paths%20and%20exclusions%20go%20here%E2%80%A6%0A%7D%0A%0Aresources%20%7B%0AsrcDir%20%E2%80%98components%2Fresources%2Fsrc%2Fmain%2Fresources%E2%80%99%0Ainclude%20%E2%80%98**%2F*.properties%E2%80%99%0Ainclude%20%E2%80%98**%2F*.png%E2%80%99%0Ainclude%20%E2%80%98**%2F*.gif%E2%80%99%0Ainclude%20%E2%80%98**%2F*.jpg%E2%80%99%0Ainclude%20%E2%80%98**%2F*.html%E2%80%99%0Ainclude%20%E2%80%98**%2F*.js%E2%80%99%0Ainclude%20%E2%80%98**%2F*.sh%E2%80%99%0Ainclude%20%E2%80%98**%2F*.dat%E2%80%99%0Ainclude%20%E2%80%98**%2F*.icc%E2%80%99%0Aexclude%20%E2%80%98**%2F*.DS_Store%E2%80%99%0A%0AsrcDir%20%E2%80%98common%2Fvuze%2Fazureus2%2Fsrc%E2%80%99%0Ainclude%20%E2%80%98**%2FMessages*.properties%E2%80%99%0Aexclude%20%E2%80%98**%2F*.class%E2%80%99%0Aexclude%20%E2%80%98**%2F*.java%E2%80%99%0A%7D%0A%7D%0A%7D” message=”” highlight=”” provider=”manual”/]

GRADLE: How to copy files from another .jar into your resulting output .jar

In our project we like to deliver a single jar as the final product, if you need to copy files that live on an existing jar into the Gradle’s output jar, this example shows you how to do that (and more)

[pastacode lang=”java” manual=”jar%20%7B%0A%2F%2Fthis%20is%20how%20you%20change%20the%20name%20of%20the%20output%20jar%0AarchiveName%3D%E2%80%99frostwire.jar%E2%80%99%0A%0A%2F%2Fsome%20exclusion%20rules%20to%20keep%20your%20.jar%20clean%0Aexclude(%E2%80%98META-INF%2F*.SF%E2%80%99%2C%20%E2%80%98META-INF%2F*.DSA%E2%80%99%2C%20%E2%80%98META-INF%2F*.RSA%E2%80%99%2C%20%E2%80%98META-INF%2F*.MF%E2%80%99)%0A%0A%2F%2Fhere%20we%20grab%20all%20the%20.class%20files%20inside%20messages.jar%20and%20we%20put%20them%20in%20our%20resulting%20jar%0Afrom%20(zipTree(%E2%80%98lib%2Fjars%2Fmessages.jar%E2%80%99))%20%7B%0Ainclude%20%E2%80%98**%2F*.class%E2%80%99%0A%7D%0A%0A%2F%2Fhow%20to%20manipulate%20the%20jar%E2%80%99s%20manifest%0Amanifest%20%7B%0Aattributes%20%E2%80%98Main-Class%E2%80%99%3A%20%E2%80%98com.limegroup.gnutella.gui.Main%E2%80%99%0A%7D%0A%7D” message=”” highlight=”” provider=”manual”/]

Top Eclipse (IDE) features I can’t live without

(If you are in Windows, replace “Cmd” for “Ctrl”, and “Option” for “Alt”)

Cmd + 1: Create variables out of function’s outputs, get suggestions to fix issues.

“Shift + Cmd + T”: Open Type.

“Shift + Cmd + R”: Open Resource.

Select element and press “Option + Cmd + R” to rename a class, variable, method, the refactor will be performed throughout the entire project flawlessly.

Select element and press “Cmd + T”: Show Type Hierarchy, great to know what classes implement an interface, or what classes extend an abstract class.

How many lines of code are there inside Bitcoin-Core client?

According to cloc this is the line count breakdown, 87% of the project is all C/C++ header files and code.

http://cloc.sourceforge.net v 1.60  T=7.23 s (72.2 files/s, 43792.9 lines/s)
-------------------------------------------------------------------------------
Language                     files          blank        comment           code
-------------------------------------------------------------------------------
C++                            244           9985           6246         211500
C/C++ Header                   188           5346           4617          35399
Bourne Shell                    26           2576           2571          20090
make                            12            905           1105           7221
m4                              17            376             98           3697
Python                          18            333            224           1615
HTML                             3             85              0           1136
YAML                             8             21            115            545
C                                1             43             11            336
Objective C++                    2             37             14            153
CSS                              1             10              1             78
IDL                              1              1              0             20
XML                              1              0              0             10
-------------------------------------------------------------------------------
SUM:                           522          19718          15002         281800
-------------------------------------------------------------------------------

WordPress: Cannot create directory error, got everything chmoded to 777?

So you went as far as chmod’ing your entire folder structure to 777 (very unsafe), you’ve hacked wp/wp-admin/includes/file.php

return new WP_Error( 'mkdir_failed_ziparchive', __( get_current_user() . ' Could not create directory. ('.$_dir.')' )...

to print out exactly what directory it cannot create and what user is trying to create the folder, everything is correct, yet it won’t create the fucking folder?

the issue might be your vsftpd configuration!

Go to /etc/vsftpd.con and make sure that you have this setting uncommented:

write_enable=YES

restart your vsftpd (sudo service vsftpd restart) and try upgrading again, you’ll want to hit that ‘Donate Bitcoin’ button if I saved your ass today.

Cheers

How to add an existing GIT repository to github.

Most of the times, it makes more sense to start working on something that slowly transforms into the beginning of a project that deserves to be on github. This post is about creating a local repository and putting it on github.

1. First we must convert the main local folder into a git repository. For this example let’s call the folder “my-new-project”. With your terminal go to that folder and type:
[bash]git init[/bash]

the repository will initialize but nothing will be added to it yet. If you type git status you will see all the things you can add to it, so use git add to add the folders you want to track, and then go ahead and do a git commit -m “initial commit”

2. Now go to github.com and create your repository “my-new-project”, and copy the clone url of the repo, I personally like to work with the one that starts with “ssh://” since I like to work with ssh keys and not have to deal with passwords.

You can easily configure your ssh certificates for multiple things, not just github but keys for many many servers working with the ~/.ssh/config file (no need to deal with effing ssh-agent).

If you created this github repository with some other account, make sure to give yourself contributor access on the github role settings, otherwise you won’t be able to pull/push.

3. Time to pull (fetch+merge) the remote repo and then push this baby up.
You do that by invoking the following commands (let’s suppose the remote url is git remote add origin git@github.com:myaccount/my-new-project.git):
[bash]git remote add git@github.com:myaccount/my-new-project.git
git pull origin master[/bash]

you should see something like below coming from the remote repo’s master branch:

[bash]warning: no common commits
remote: Counting objects: 4, done.
remote: Compressing objects: 100% (2/2), done.
remote: Total 4 (delta 0), reused 0 (delta 0)
Unpacking objects: 100% (4/4), done.
From github.com:myaccount/my-new-project
* branch master -> FETCH_HEAD
Merge made by the ‘recursive’ strategy.
.gitignore | 6 ++++++
README.md | 2 ++
2 files changed, 8 insertions(+)
create mode 100644 .gitignore
create mode 100644 README.md[/bash]

and then just
[bash]git push[/bash]

and you’re done, you should see your initial commit on github now.